


1 of 11
-
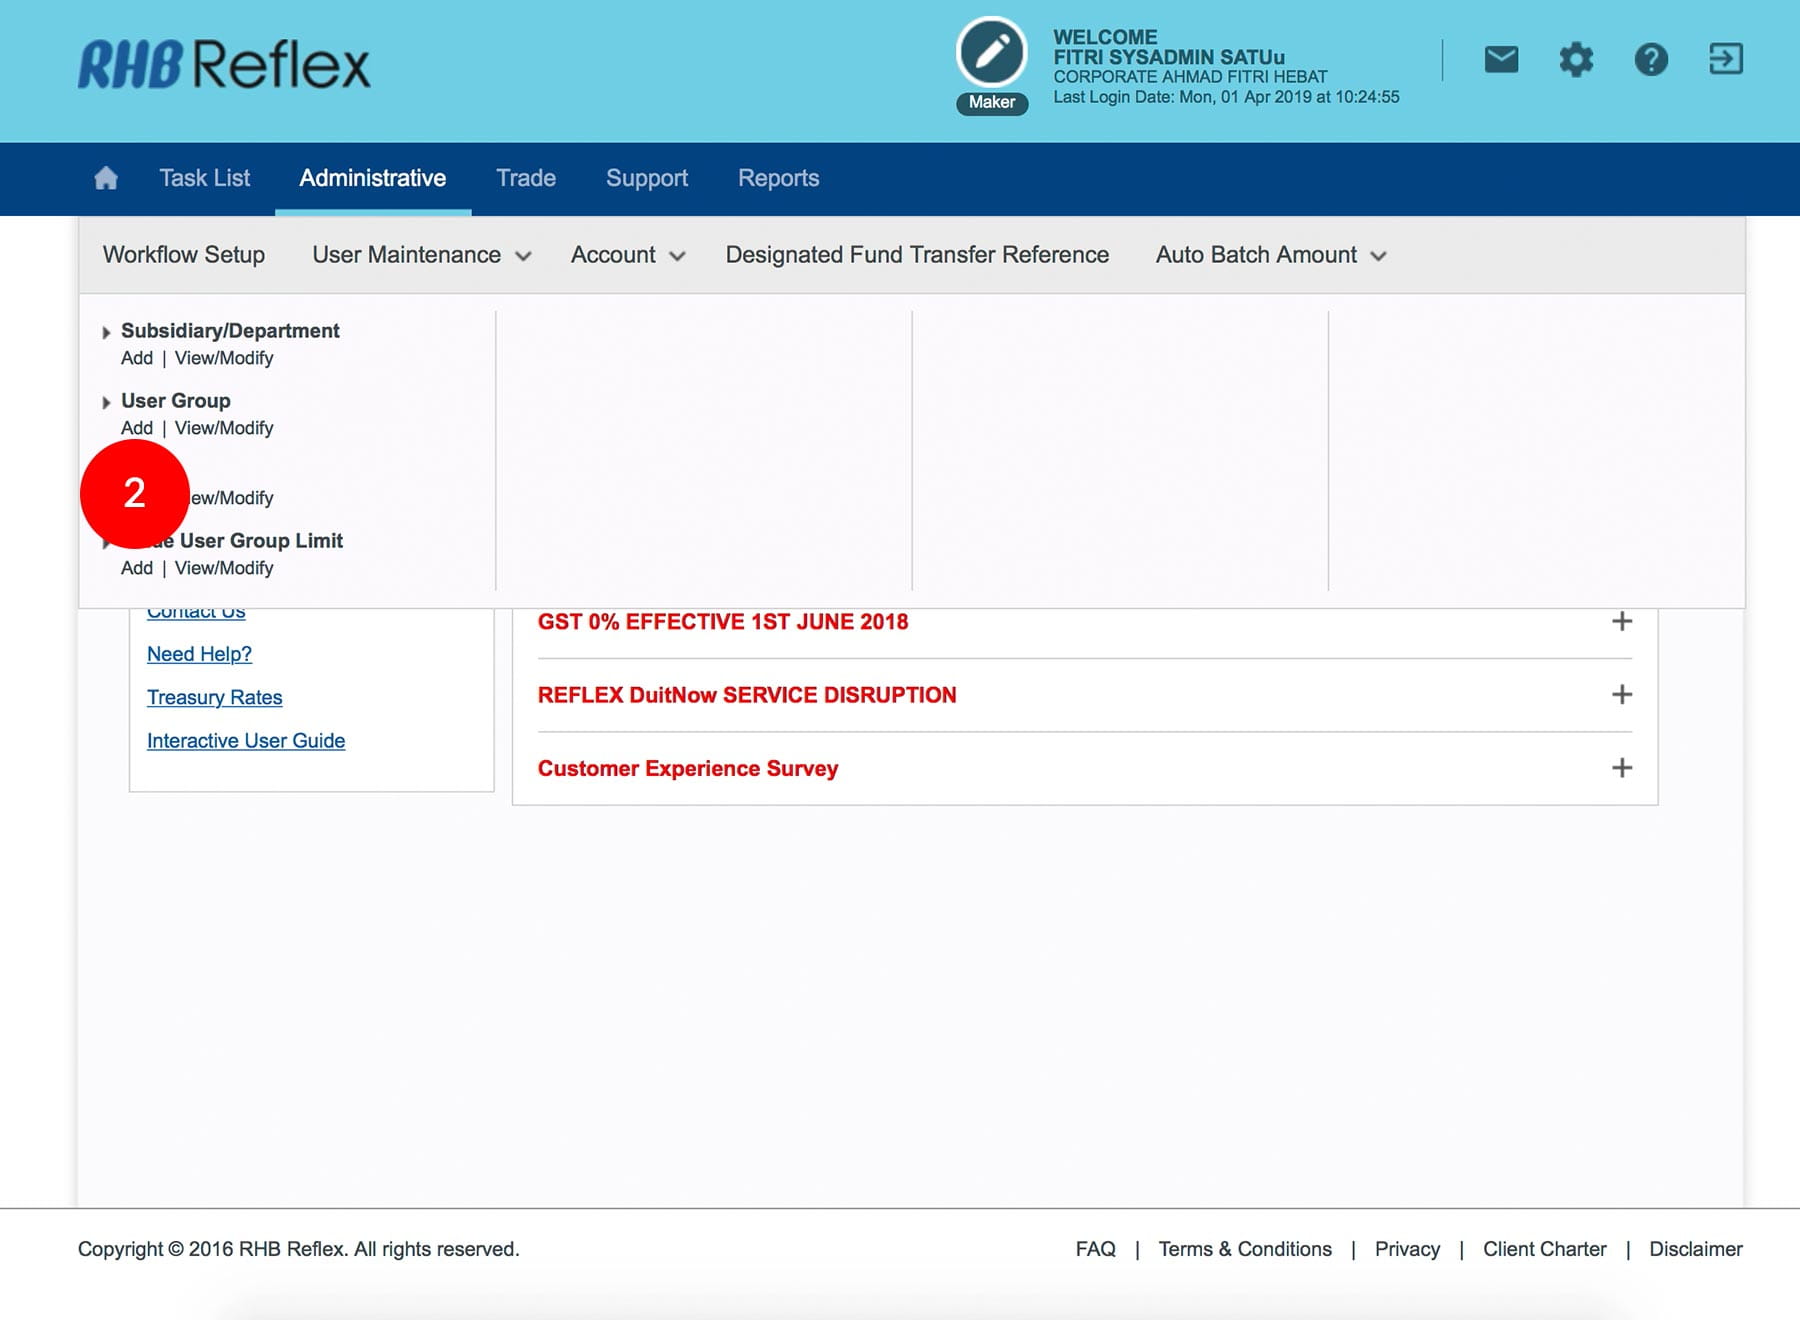
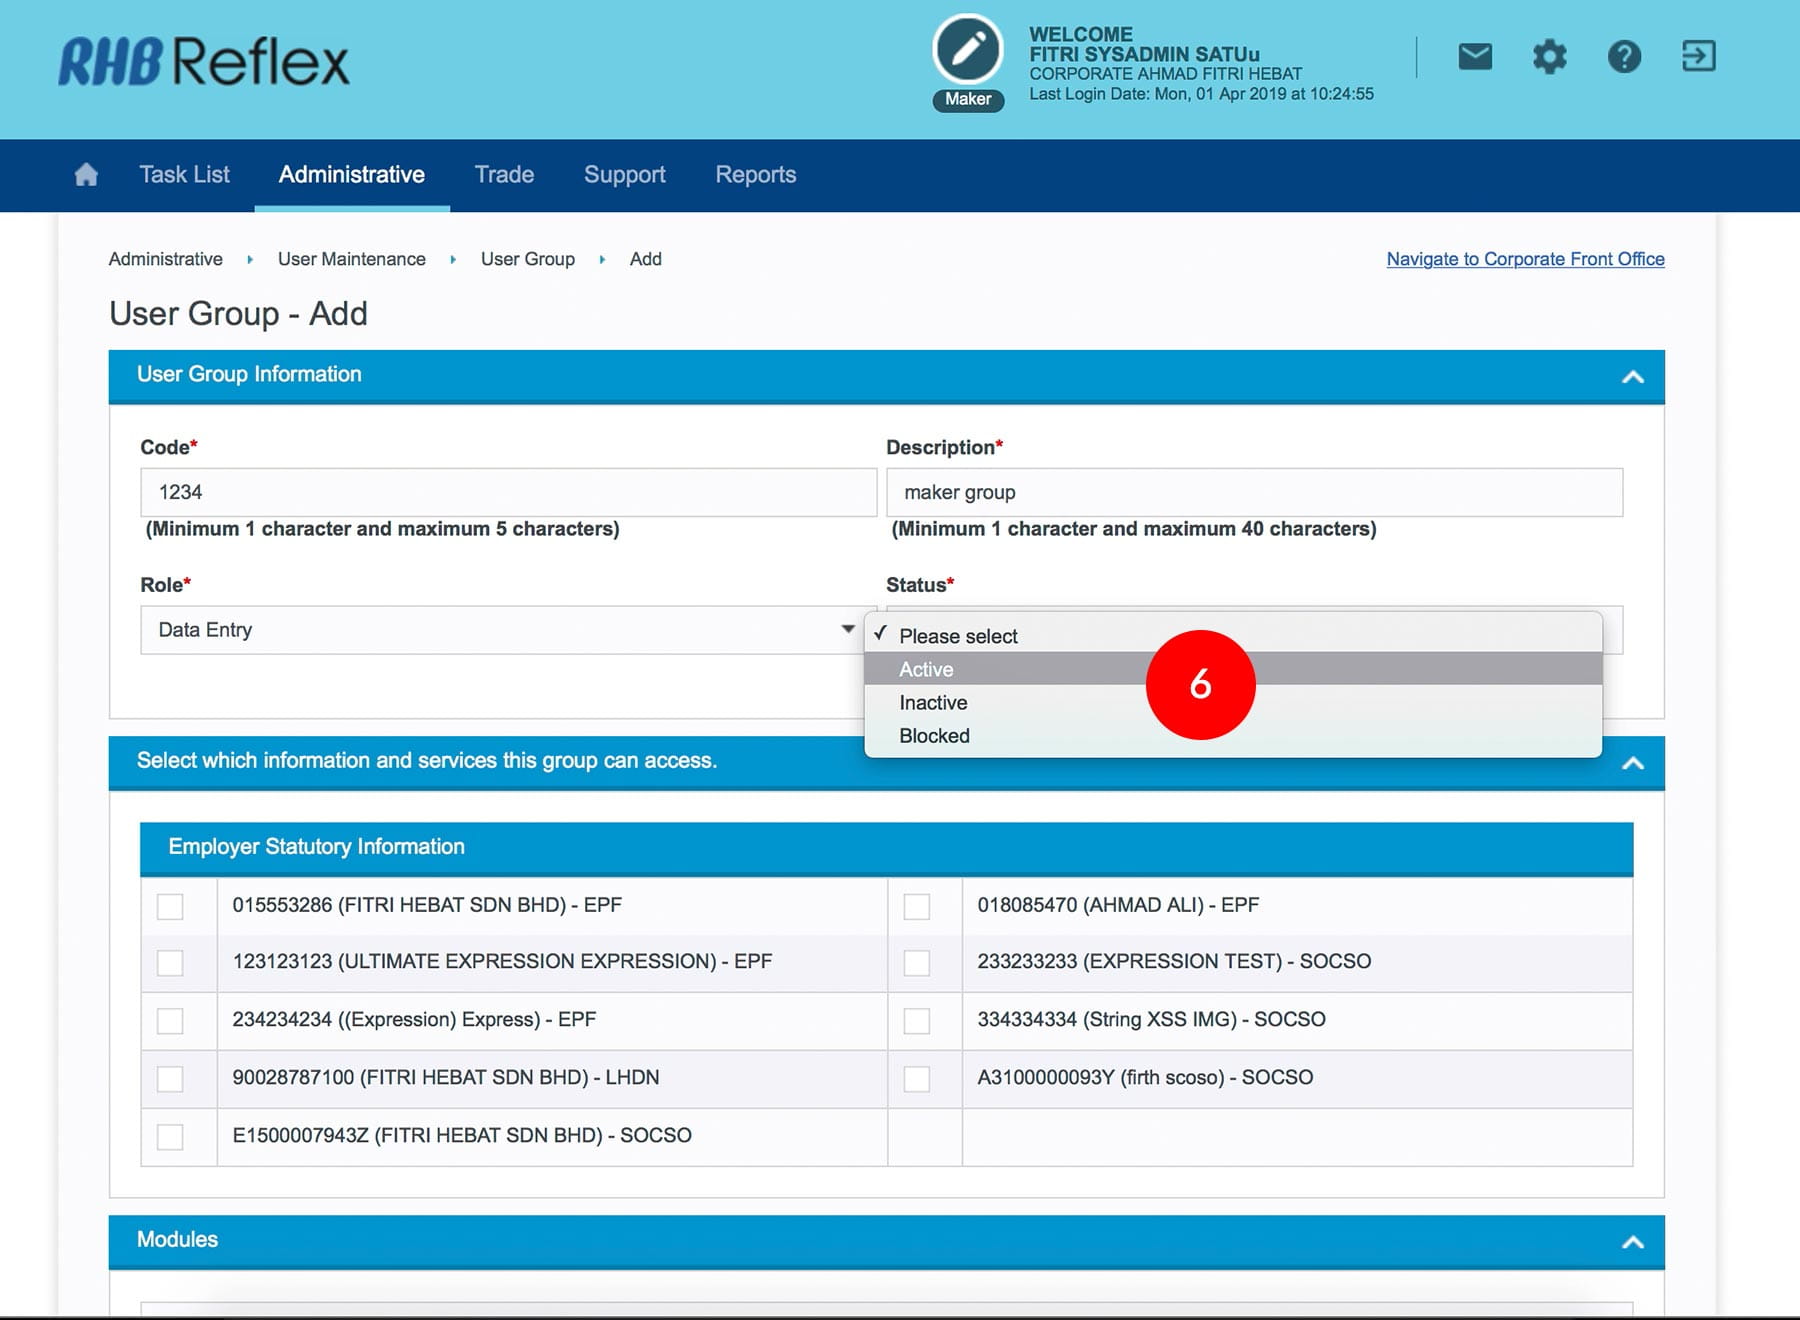
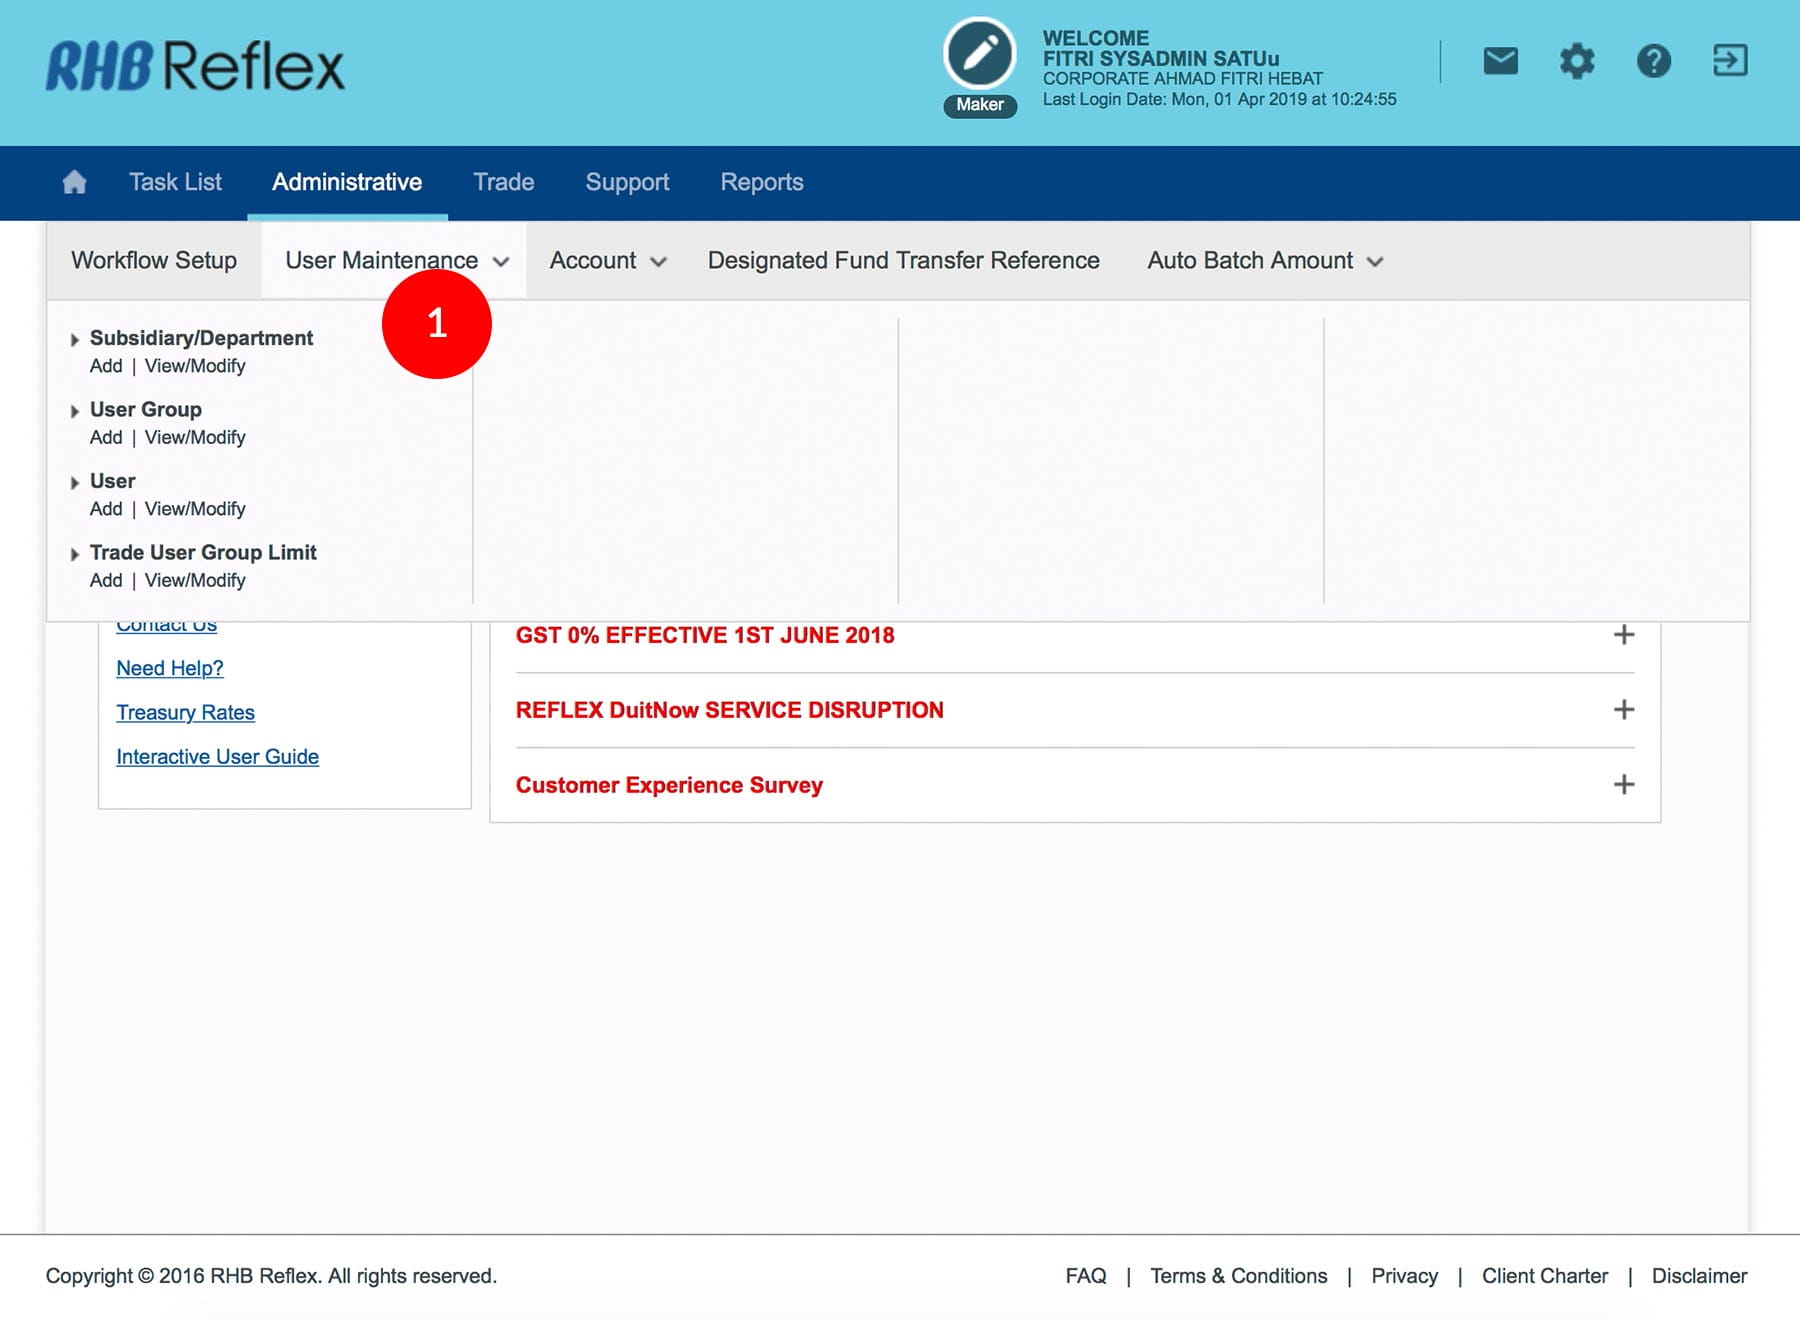
1.Login as Sysadmin1 and under the “User Maintenance” tab; select “User Maintenance”
-
2.Under “User Group”; click “Add”.
-
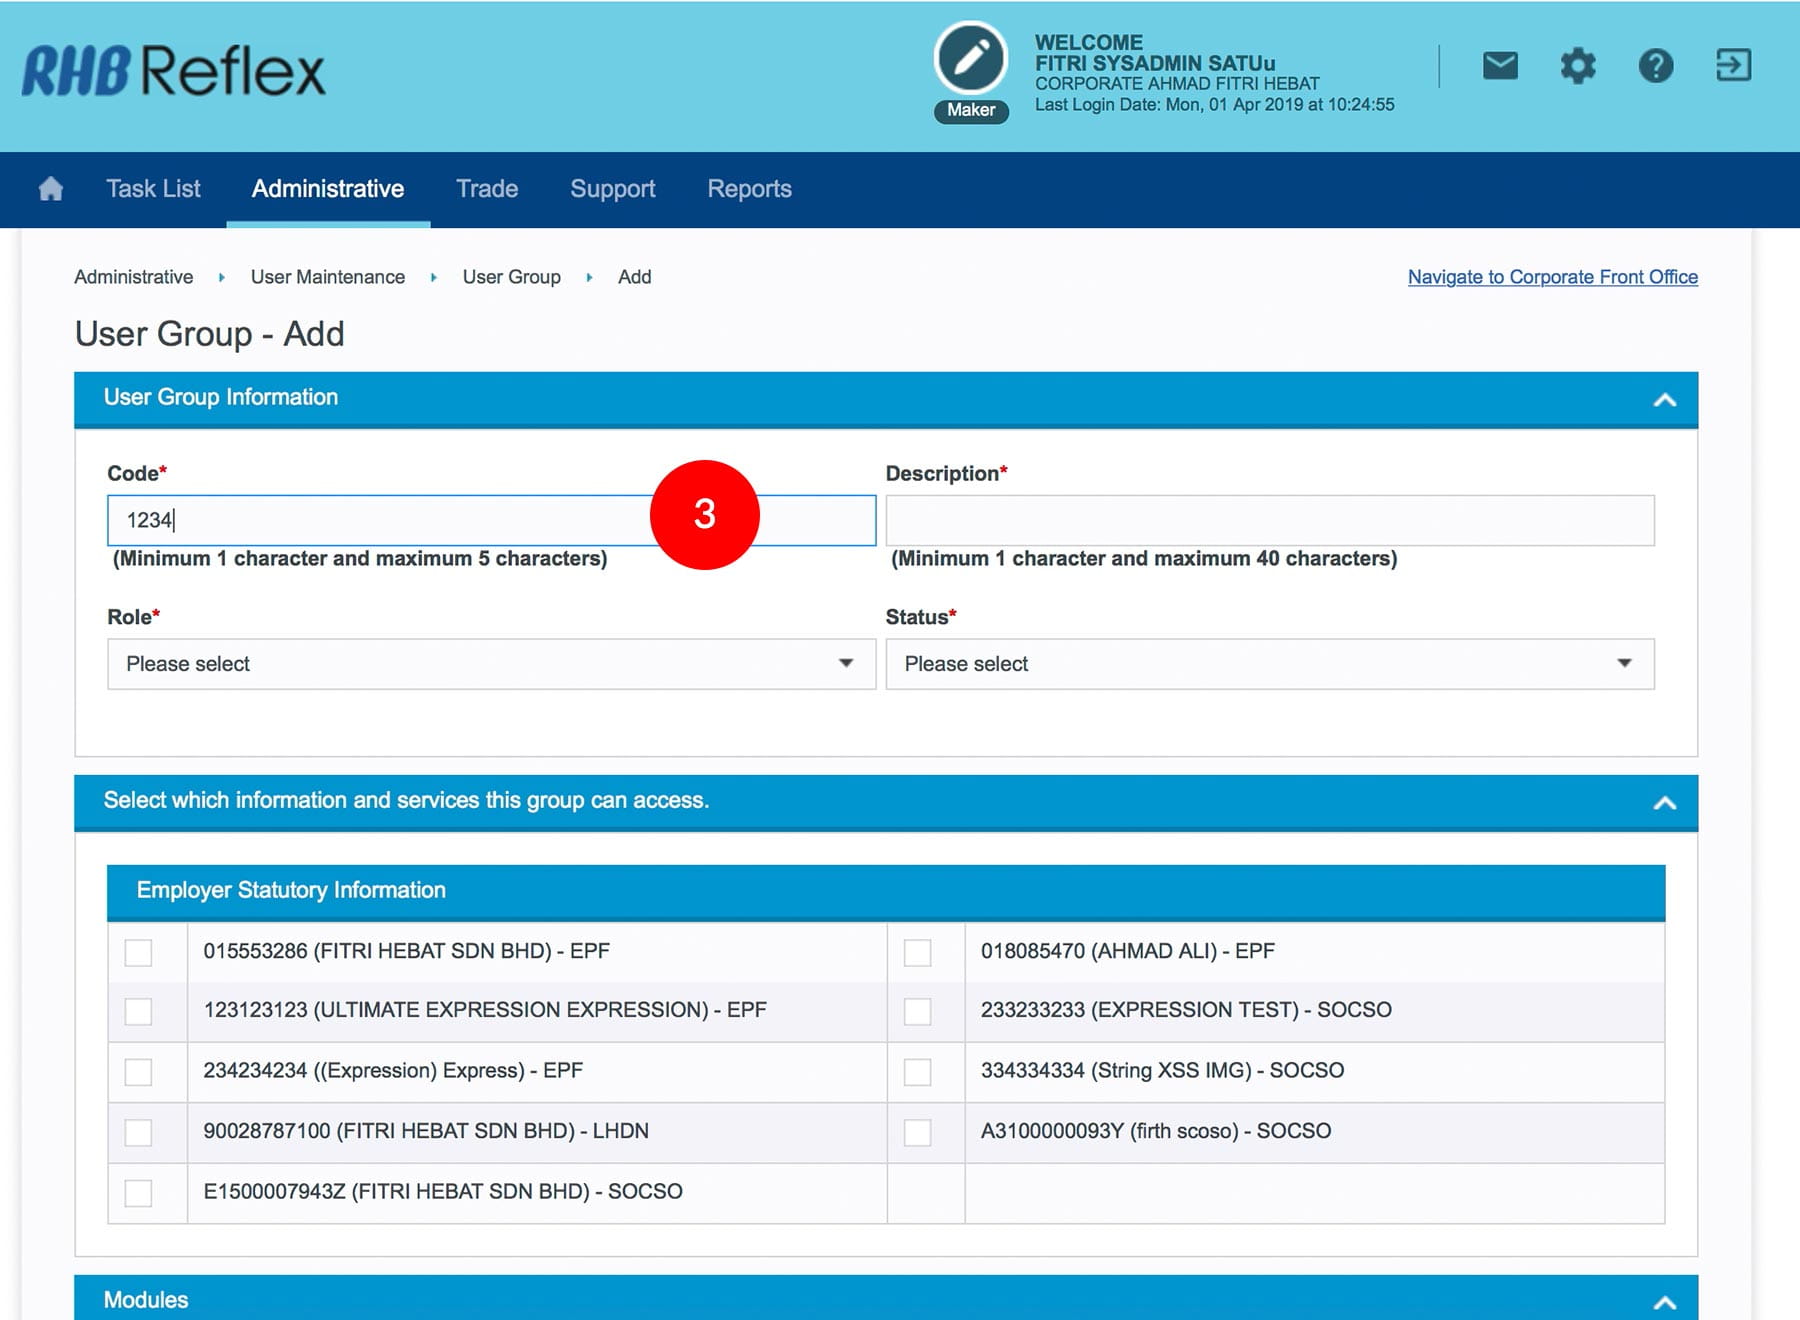
3.Type in a Code - System identification number for the User Group (minimum 1 character & maximum 20 characters).
-
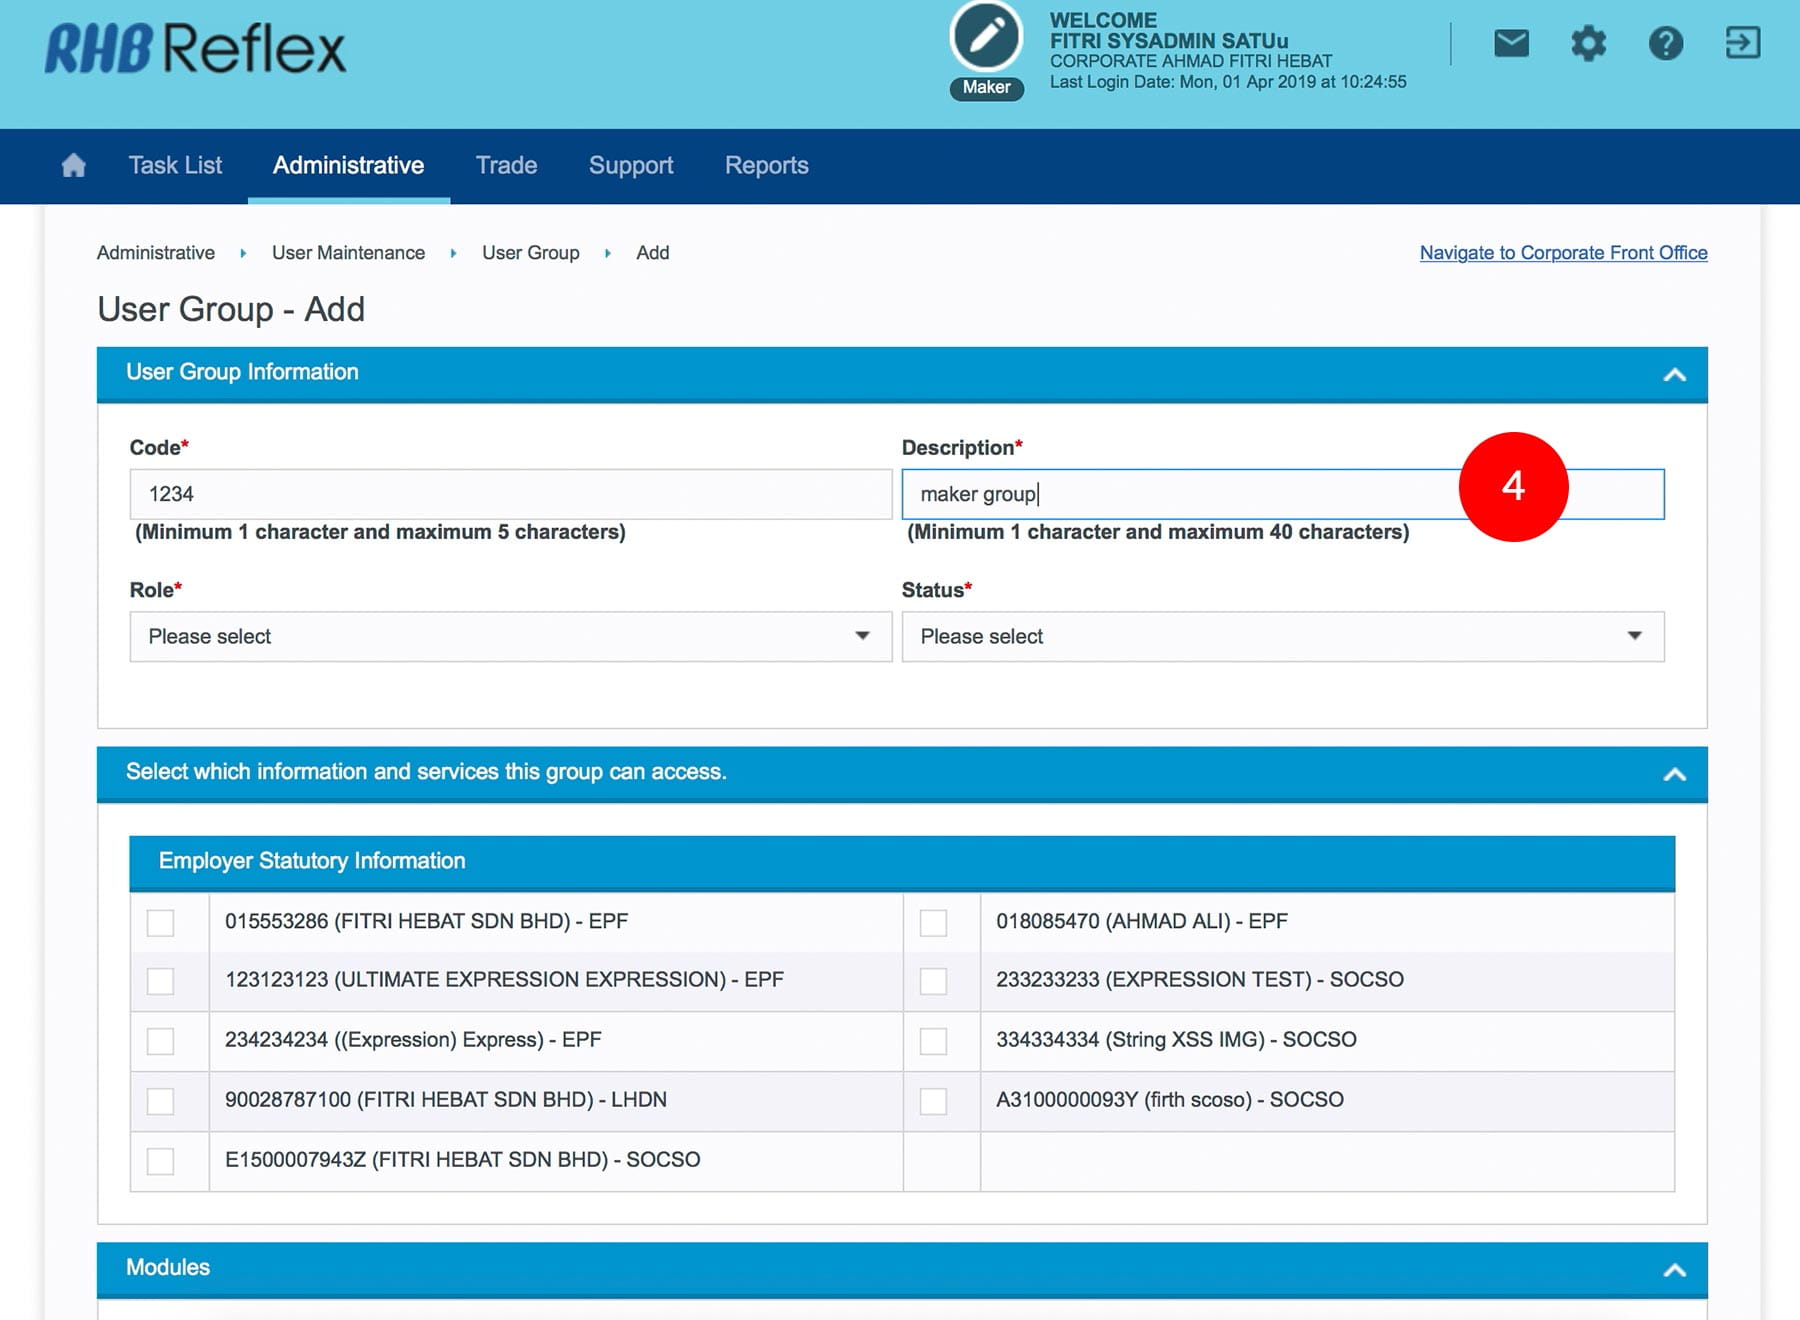
4.Type in the Description - minimum 1 character & maximum 20 characters i.e : Data Entry Reviewer, Authorizer, etc.
-
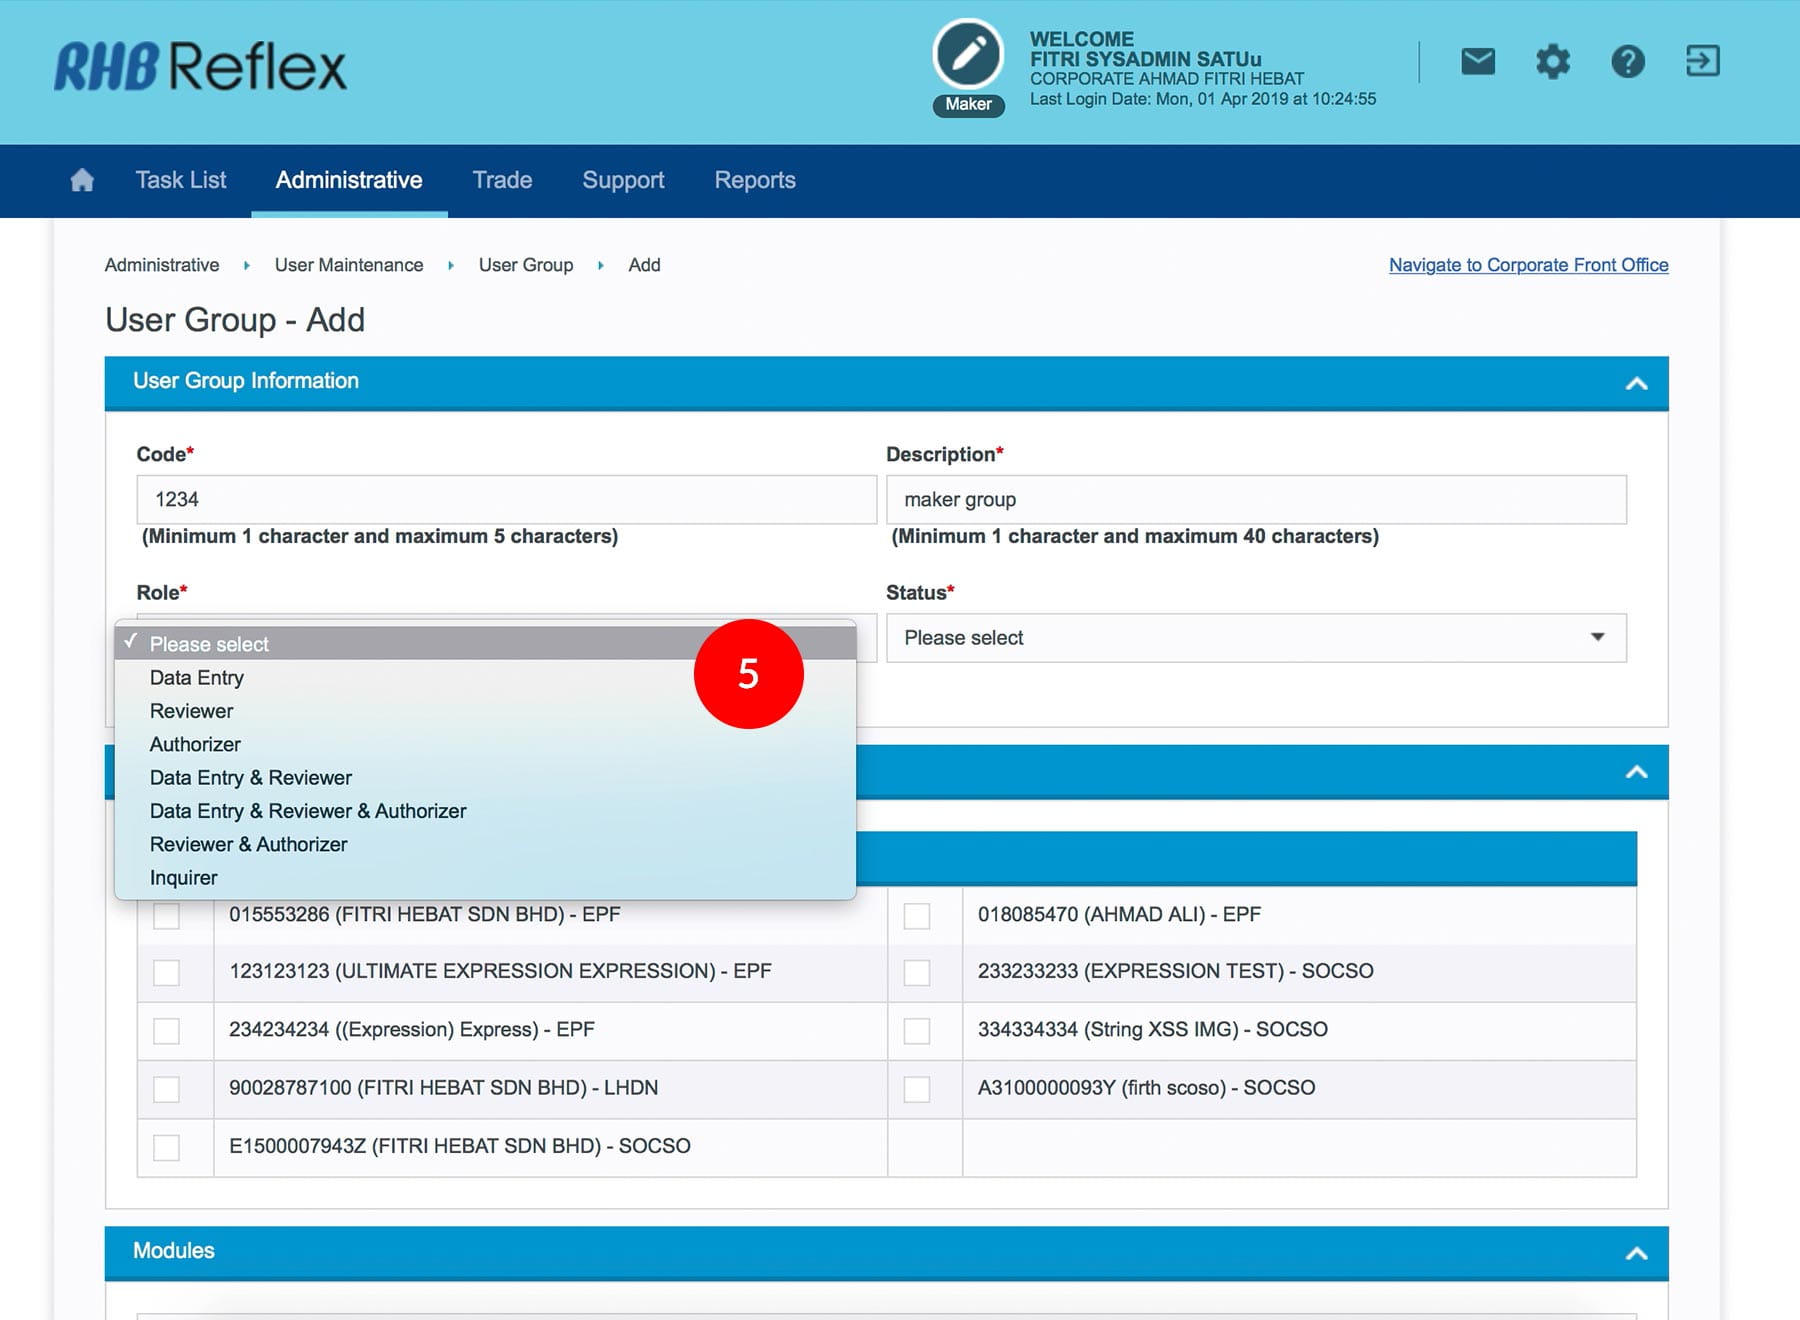
5.Select Role for your user.
-
6.Select Status as Active.
-
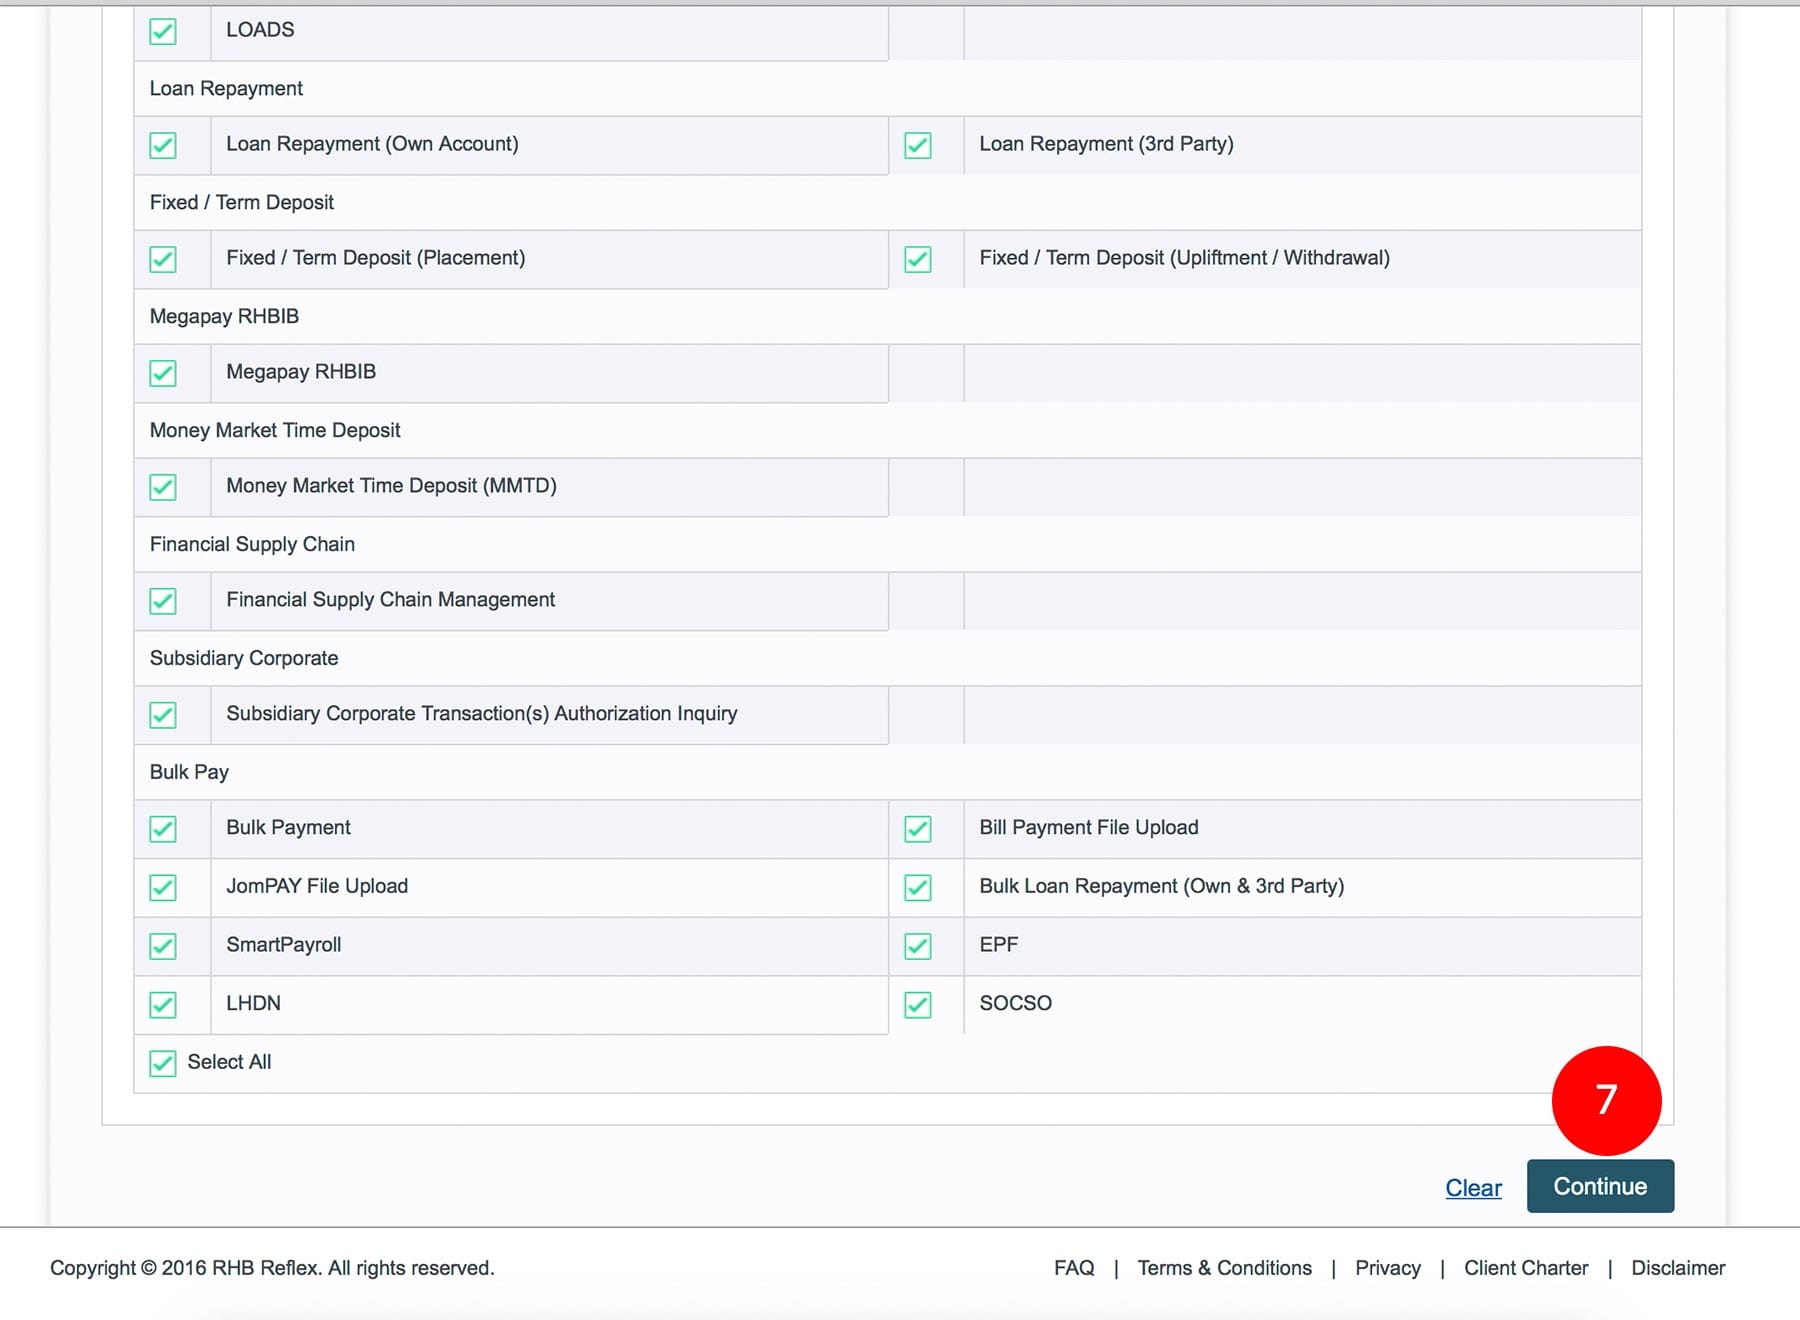
7.Click
 to proceed to next step.
-
8.Tick the
 Check Box
of the account you wish your user to view. You have the options to choose what type of
modules your Data Entry and Authorizer can view. We recommend that you select All the
Modules.
Check Box
of the account you wish your user to view. You have the options to choose what type of
modules your Data Entry and Authorizer can view. We recommend that you select All the
Modules. -
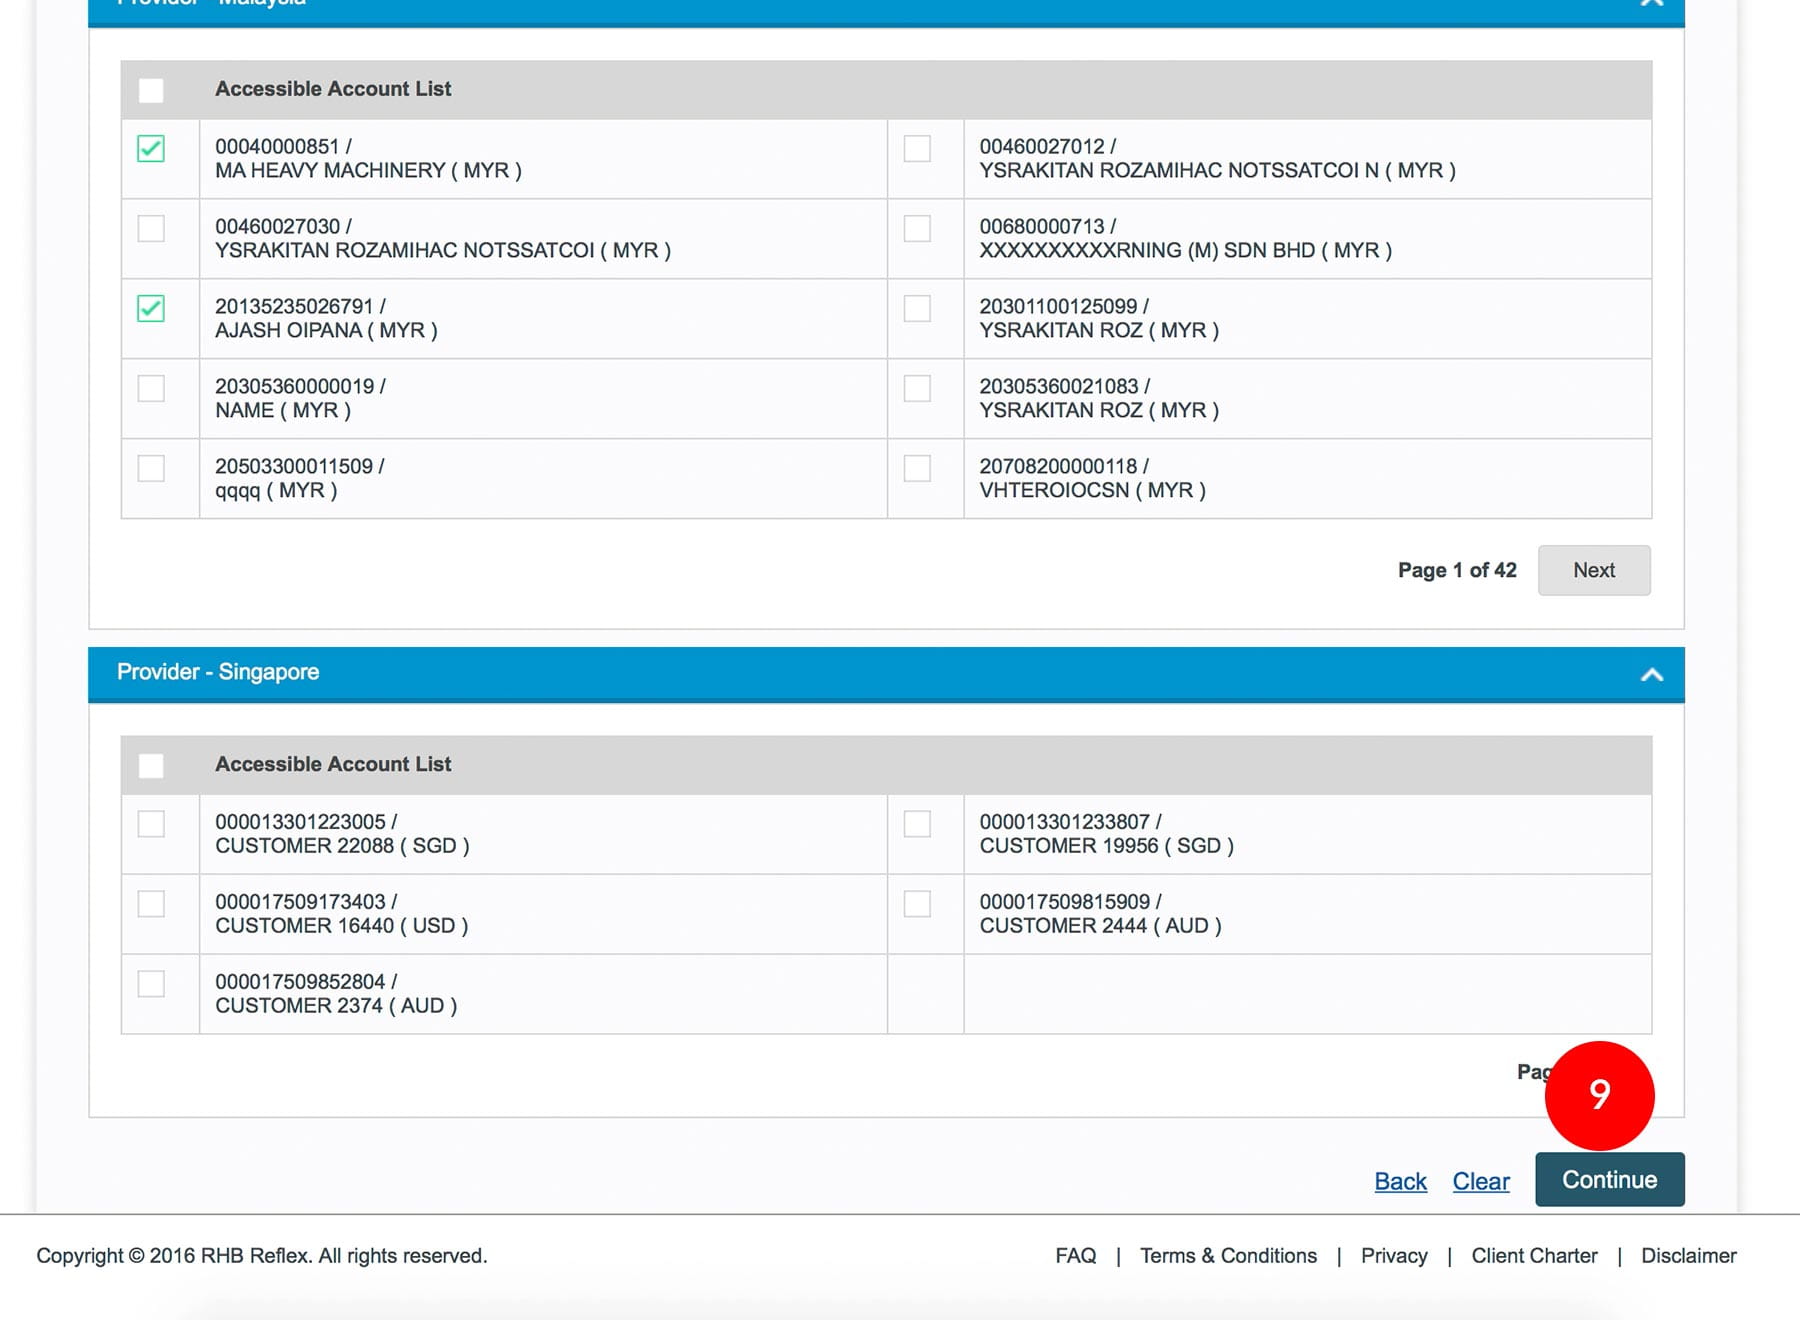
9.Click to proceed to next step.
-
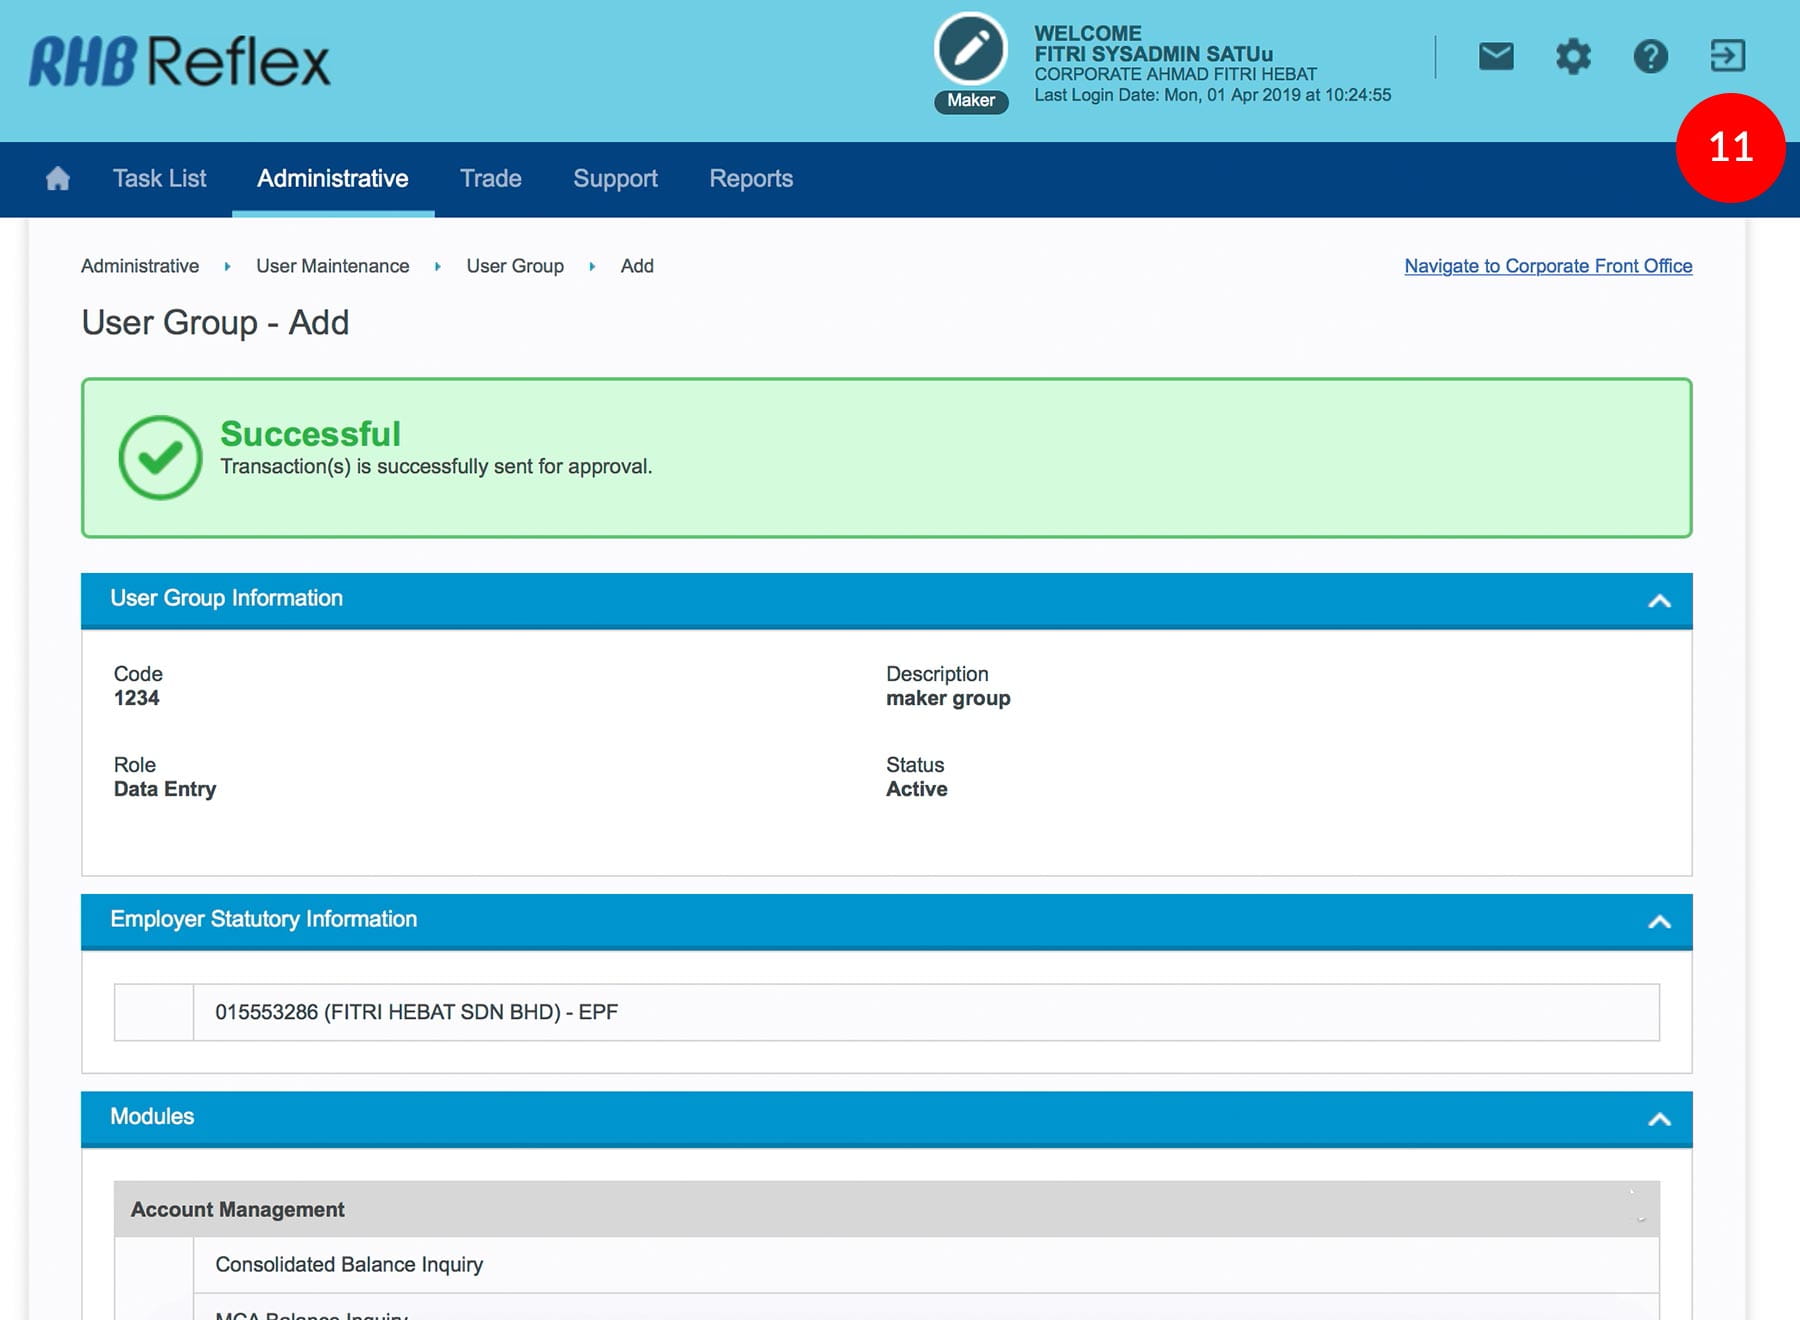
10.Click
 to send for approval. A
message of “Transaction(s) is successfully sent for
approval.” will be displayed. This indicates that the creation has been sent to
Sysadmin2 for approval.
to send for approval. A
message of “Transaction(s) is successfully sent for
approval.” will be displayed. This indicates that the creation has been sent to
Sysadmin2 for approval. -
11.Click
 on to Logout.